Upholstering an Antique Chair | Part 2 |Dressing it back up!
10October 4, 2015 by Terry
Today we are ready to redress this lovely little chair. (Click Here to see the deconstruction phase)
Because I am giving this chair a completely new look, I decided to give the wood a coat of MMS Milk Paint in the colour Linen before starting the upholstering. I sanded it smooth and finished it with a coat of clear wax.
———————————————————-
To begin upholstering the chair I started with the seat. I wanted my cushion to be attached to the chair so I removed the foam from the original cushion cover and placed it on the seat part of the chair. I added some extra batting to smooth out the shape and create a seamless feel between the cushion and the chair frame.
Next I placed my fabric over the seat and measured it to make sure that the material would cover the sides and front and back . I then cut it. You should have a large square piece at this point.
Place it over the seat and start by cutting out where the arms attach to the seat …
I folded the material back and lined it up with the arm like so…
then cut from the edge like so towards the arm…
Do it again but for the other side of the arm. Do not cut all the way up to the arm because you will want to fold it under to make a nice edge like so…
&
Fold the little flap under and fit it nicely around the arm of the chair. Don’t pull too tight. Secure it with some staples under the frame. Do the same to the other side of the chair around that arm.
I did place a few staples on the front edge of the seat to hold the material in place.
When you are working with a print you really need to be conscious of whether or not you are keeping the pattern straight.
Once I worked the material around the arms I continued stapling the fabric all the way around the bottom of the seat leaving the corners for last. When I got to the corners on the front I manipulated the fabric into pleats instead of doing just a regular box corner. I thought this would add a little detail to the chair and keep the corners looking round and plump. When stapling your fabric you want to have the material snug but not too tight. If you pull it too tight then the fabric has no give for when someone sits on it and the fabric can be pulled from the staples.
Pleated corner of the chair
You will also want to trim your fabric close to the staples if you didn’t pull it right under the underside of the frame. Normally one would pull it right under the frame but I made the mistake of not allowing for this… even though I told you to do so :/ … of course, this was before I thought of the tutorial part! It’s not a horrible mistake as it can still be hidden but it looks more professional to pull it under.
Now you are finished the seat.
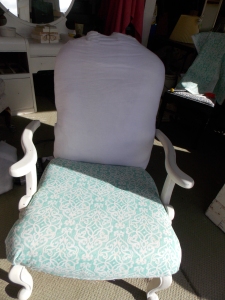
Moving on to the back. I decided not to make it a channel back like it was before but I did reuse the filling. I also added more batting to smooth it out and just make it a straight back. For me this was simpler than sewing channels as I’m not known to be a great sewer anyways … or maybe I was just being lazy … ha ha
After I stapled the batting into place I added the fabric over this. I made sure to try and line up the print to the print on the seat. Ensure your print is facing the same direction as well.
This is where I forgot to take the rest of the pictures! Sorry! I got so wrapped up in finishing it that I forgot to take more of the back. sooooo …
Place your fabric over the back the same as when you did the seat. You may use the old fabric as a pattern if you like making sure to cut it at least 1/2 inch larger to allow room to staple. you will trim off the excess after anyways.
After you have stapled it all around the frame all you have left to add is the cover for the back.
Again you may use the old piece of material as a pattern for this. Once your back is on you can start adding on the trim to hide all your staples and give it that fresh professional look.
This is what the back side looks like with the trim added to hide the staples
I started at the back and went around the bottom and arms last. I used a hot glue gun and some good quality glue to fasten it on.
I used wider trim than I would have liked to but this was all my local fabric store had.
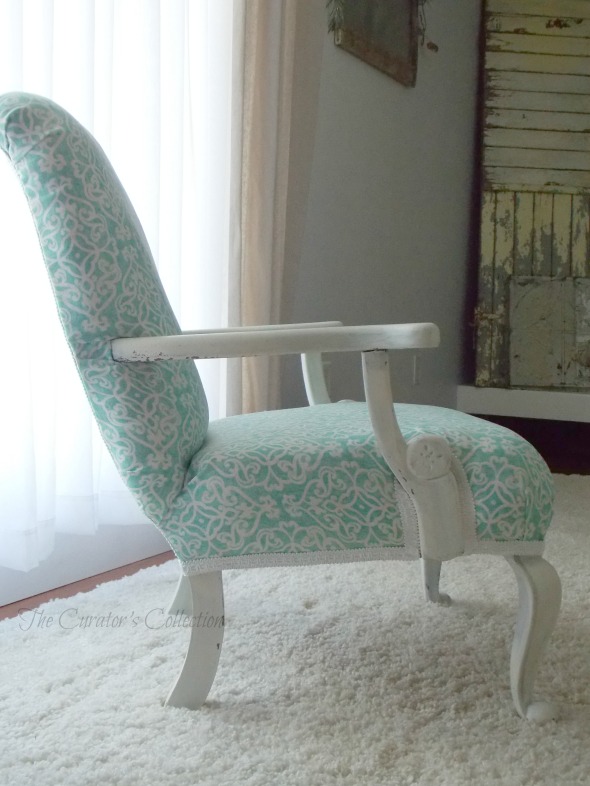
And here she is all redressed!
This was a very simple and easy makeover to do and really didn’t take too long.
Now it looks fresh and pretty and can no longer be called the “bug chair”
No more bugs for this sweet little chair :0)
It went from this…
to this…
I hope this tutorial is a little helpful .. I do wish I had taken more photos towards the end as it was the most important part! oops! Next time I promise to do better!
Happy upholstering!
If you would like to see this sweet chair in person I have taken it to my booth!
Smiles!
Terry
Sharing this post at:


What a beauty! Thanks for the step by step tutorial too!
LikeLike
Thank you Darrielle! Thank you for stopping by! Have a great week!
Smiles!
Terry
LikeLike
[…] used them as props for my photoshoot of the chair I upholstered (Click to see that post here) but they would make for interesting decor in any room […]
LikeLike
Upholstering a chair like that is no joke. You did an amazing job!
LikeLike
Thank you Susan! Thank you for taking the time to pop by and give such a nice compliment! I hope you will join me this Thursday for the Making Broken Beautiful party!
Smiles!
Terry
LikeLike
Excellent tutorial, but I think you may need to come here to show me (actually do it for me) on my chair… ;)
LikeLike
You should bring it here so I don’t have to haul my tools! ;) I’d be happy to “help” you!
Smiles!
Terry
LikeLike
What a transformation! You’ve definitely given it a new life! Thanks so much for sharing it with us at The Creative Circle! We looking forward to seeing what you have to share next week!
LikeLike
Thank you Angela! Happy to join in you great party!
Smiles!
Terry
LikeLike
[…] Upholstering an Antique Chair […]
LikeLike