Quick & Easy Changes That Create A Large Impact
7March 6, 2015 by Terry
Today I would like to talk about how simple it is to update a piece of furniture!
When this bench came to me it was really quite bland. The off white paint had yellowed and even though the fabric seat was in mint condition, it was very outdated for today’s style.
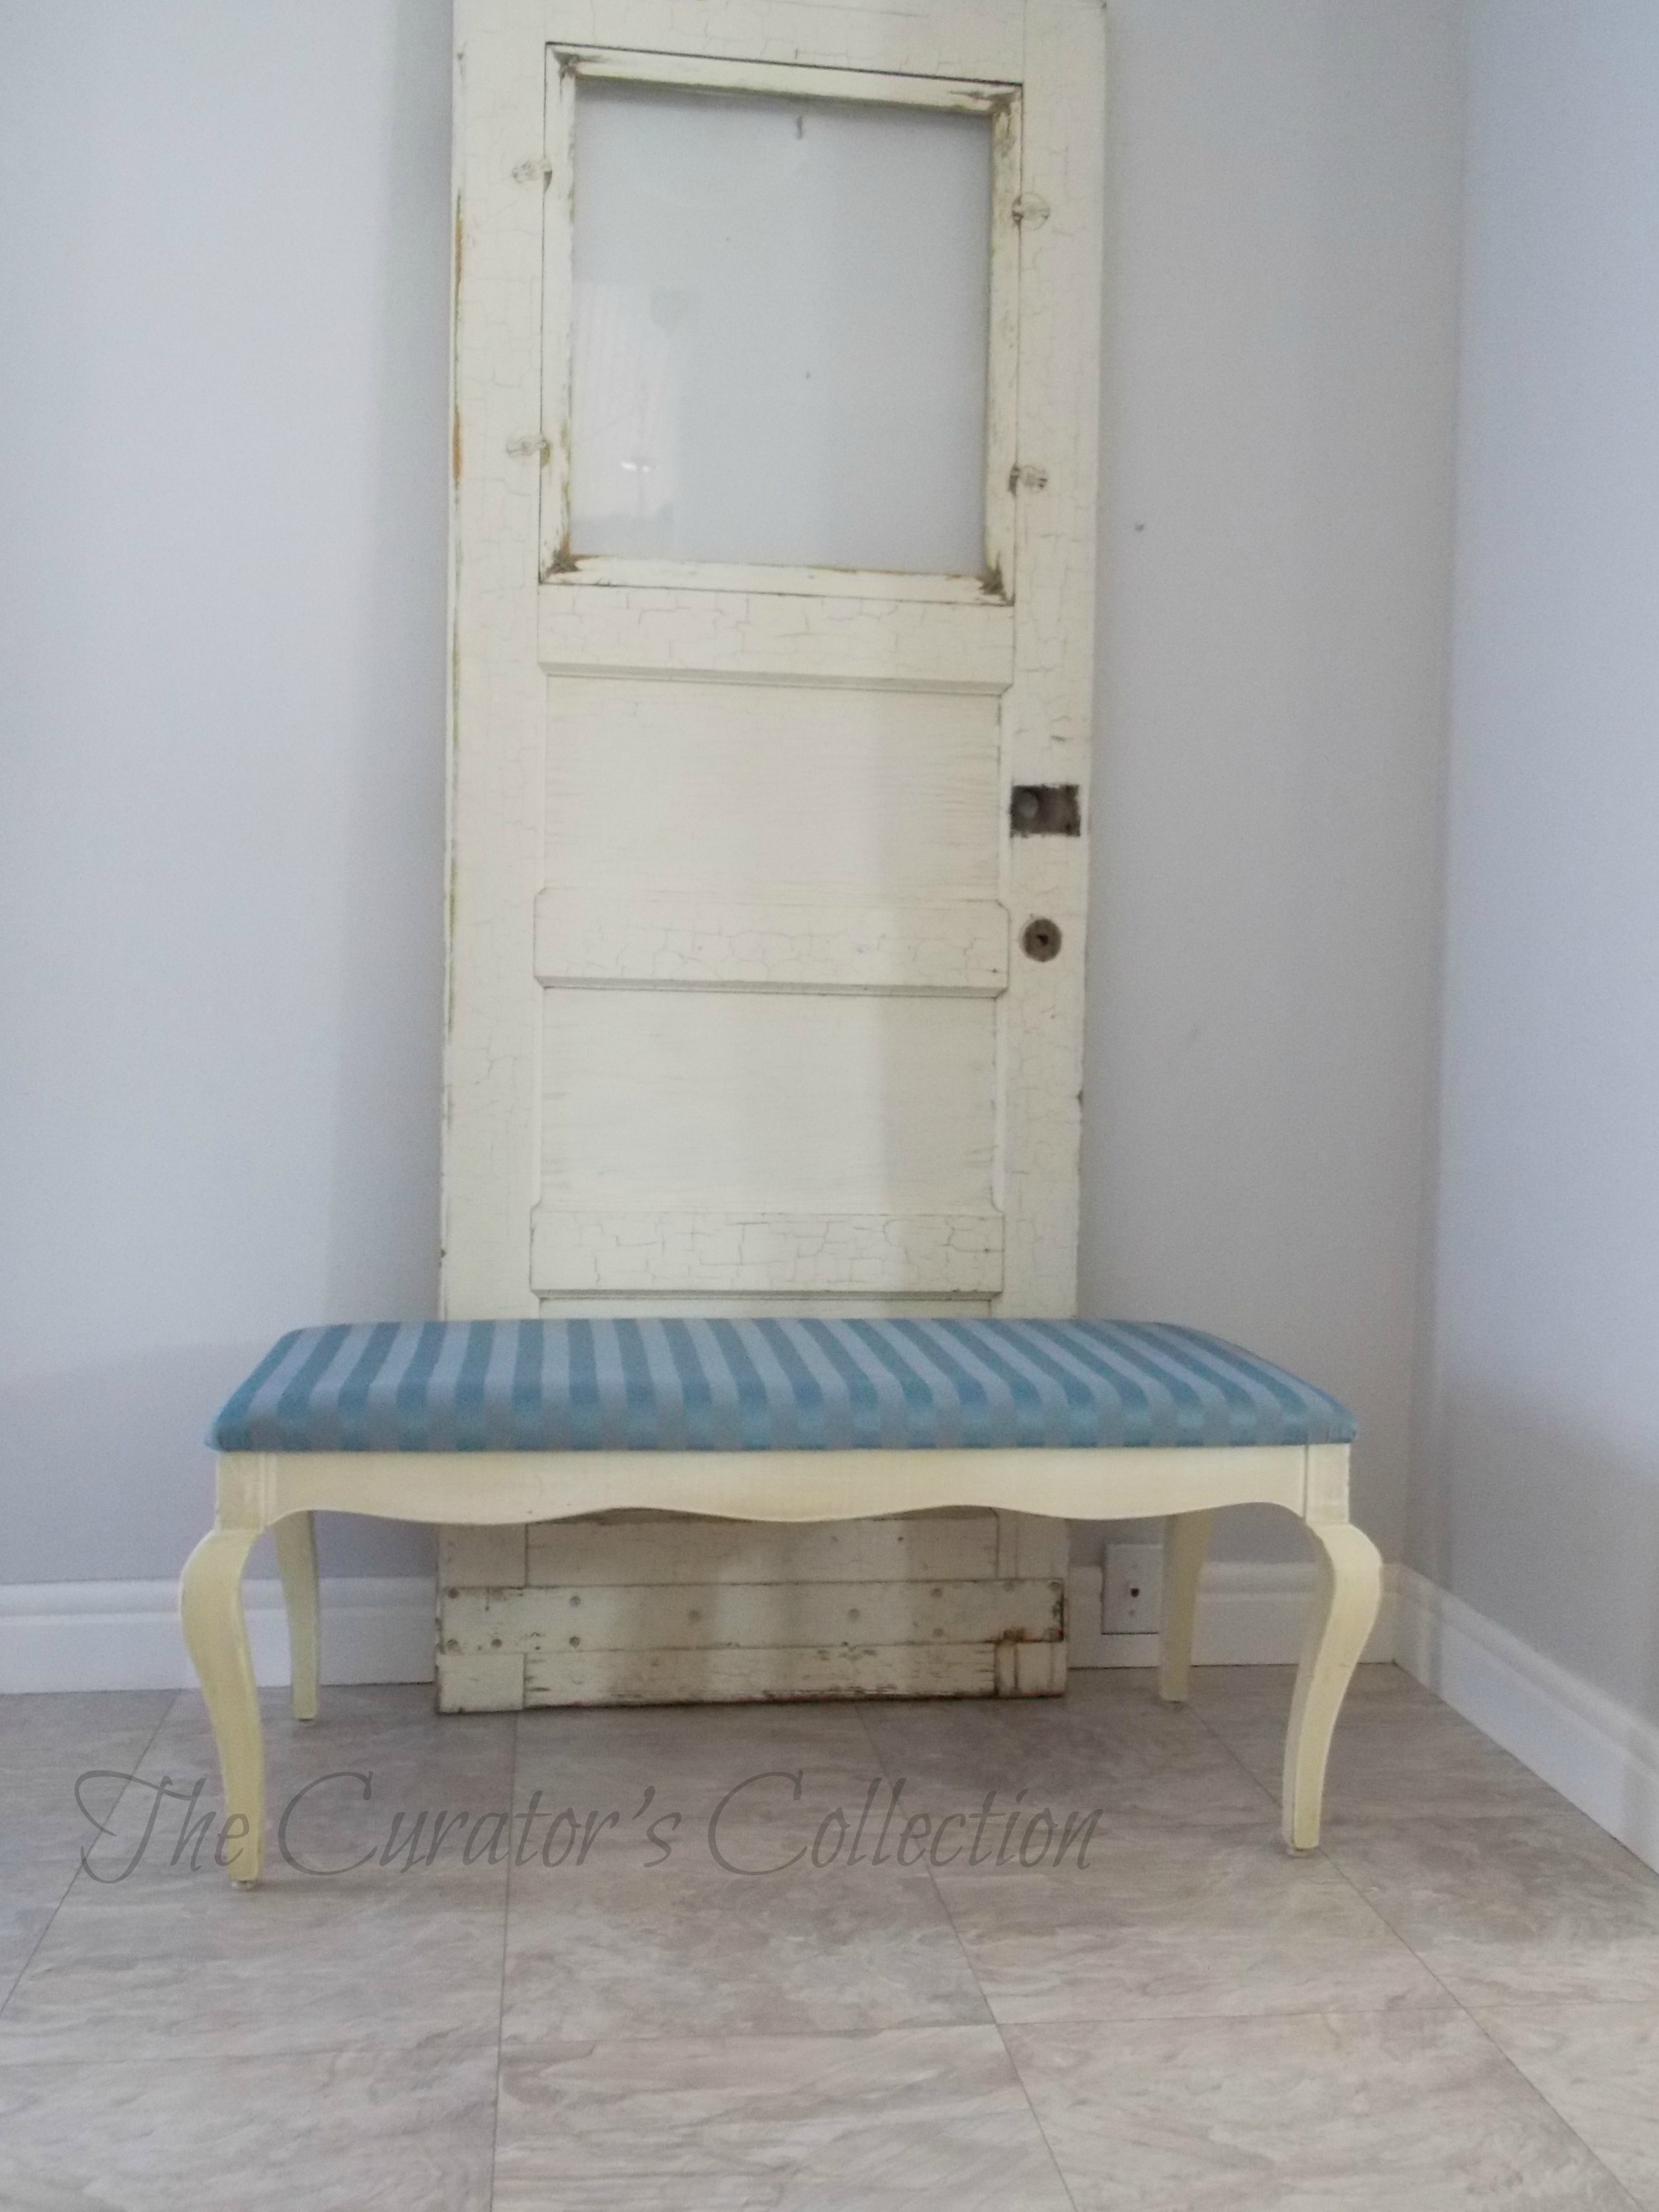 Not to sound mean about it, but it was sort of boring and lacked the classiness it deserved. Those pretty curves just weren’t being complimented by the fabric on top or the color!
 I removed the seat and sanded down the frame. This took maybe a total of 10 minutes…super easy!
 Next I mixed up 1/4 cup of Typewriter (MMS Milk Paint) and added 1/4/ cup of bonding agent. I did not want the chippy effect I may have gotten without it. Even though I did sand it down first, adding the bonding agent ensures that it won’t chip.
I applied my first coat of paint to the frame. Because I like to do multiple thin coats rather than one thick coat of paint, it dries rather quickly and gives me a smooth, even finish. I also find that when I use bonding agent in the paint that sometimes I don’t need to sand it either. (UNLESS I feel brushstrokes or tiny bumps when I run my hand over it)
When you are painting a piece of furniture finish is VERY important and makes the difference between home made looking or professionally done.
I cannot stress it enough when I say that if you take your time and do a job properly, it is easy to achieve a professional look. Anyone can do this by taking the time to follow each step even if it is one that is not particularly enjoyable. For me the nasty part of the job is the sanding and prep work. I just want to get to the “good” part of a project. I always force myself to prep properly or I won’t achieve the finish I want. If I’m going to attach my name to it, it MUST be done well!
Okay… enough of that lecture! :)
I applied 3 light coats of milk paint to the frame. Between coats of paint I upholstered the bench seat. Super easy to do also as it is just a large rectangle and there was no piping around it. This too was another 10 minute job. Simply cut a piece of fabric to the size of the top and pull the fabric around the seat and fasten with staples underneath. Do not pull the fabric too tight or you will see pulling of the fabric and it won’t look even. Just make it snug enough to maintain a nice smooth surface all over.
After your frame is dry and you have achieved the desire look of the painted finish, reattach the seat to the frame. This bench only had 6 screws holding the top in place so it was super easy to reassemble.
And here it is!
 Stunning difference! … all dressed up in black with a new classy print on top.
 I fell in love with this print while out shopping for fabric for another piece. It was on sale and I couldn’t leave it. It was originally $29.00/meter, I had no plans for it at the time … just knew I loved it :) Turns out it was perfect for this project.
 When you restyle a piece like this it gives it versatility. Originally this piece looked like it was really meant for the end of a bed in someones bedroom. Now it could be used for an entryway to sit on and tie your shoes, or in a living room as an ottoman/coffee table (this is how I styled it for the photo shoot). It would also compliment a dining table as extra seating for dinner, or in a breakfast nook…. endless options :) …. In a bathroom with wire baskets under it filled with fresh towels…. Okay, you get the idea(s) I’ll stop now :)

 It is hard to tell on these pictures because of the fluffy rug, but I added small castors to the bottoms of the legs to make it easier to move around. Especially if it is being used as dining room seating, it is easier to pull up to the table and you don’t need to climb over it.
 This project took a total of 2 hours to complete and most of that was waiting for the paint to dry between coats. A little effort and the right choices in materials = a huge impact! New life and new uses for this bench!
 Smiles!
Terry
Linking up to:


WOW!!!!!!!
LikeLiked by 1 person
Beautiful. I really love your work! Thanks for the great tips. I try my hardest but I can’t paint worth diddly-squat. I pick up a paint brush and my hand starts shaking, or maybe it’s the paint brush trying to get away. IDK. I really want to paint the headboard in the guest room. Scared for over a year now. With these tips…if I use the bonding agent I may not need to sand between coats? Sorry, don’t mean to sound….dah… but I really don’t know. Thanks for the tips….Again beautiful.
LikeLike
Hi Linda! You are too funny! I had a good chuckle about your paintbrush and shakey hands :) lol! If you are using milk paint and your headboard has a shiny finish then you should add the bonding agent to be safe. Also make sure you sand it a little before you start as that will help the paint adhere as well. You don’t need to go crazy though and sand it down to raw wood or anything. Just a good hand sanding with maybe a 180 grit or 120 grit sandpaper. I found that for my projects using the typewriter color of milk paint and bonding agent, I haven’t needed to sand between coats. Sometimes milkpaint goes on a little gritty and the small bits that dry on should be sanded off (very lightly) between coats (I use 400 grit for this part and for the final sand) in order to get a nice finish. I know it sounds like a tonne of work but it really isn’t as your goal isn’t to sand all the paint off but just to smooth it out. I hope I didn’t ramble on too much :) If you have any other questions I’m happy to help if I can! I hope you will share your headboard project when you’re finished :)
Smiles!
Terry
LikeLiked by 1 person
Thanks Terry!!! Yes it does have a little shine to it not much. Good to know about the sandpaper grit numbers!…I’m going to try the base of the headboard first. If it turns out, I’ll share, if it doesn’t…you will never hear me utter another word about it. I will conveniently forget to mention it. LOL!! Thanks Terry I appreciate it!
LikeLike
No problem Linda…. I’ll be checking in on it so don’t try to hide:) Ha ha!
Happy painting!
Smiles!
Terry
LikeLiked by 1 person
Stunning transformation, it looks bang up to date now, a really high end look. Great job!
LikeLike
Thank you so much for your compliments and for taking the time to do so :) I hope you had a great weekend!
Smiles!
Terry
LikeLike