
Vintage Book Page Christmas Tree
4November 8, 2014 by Terry
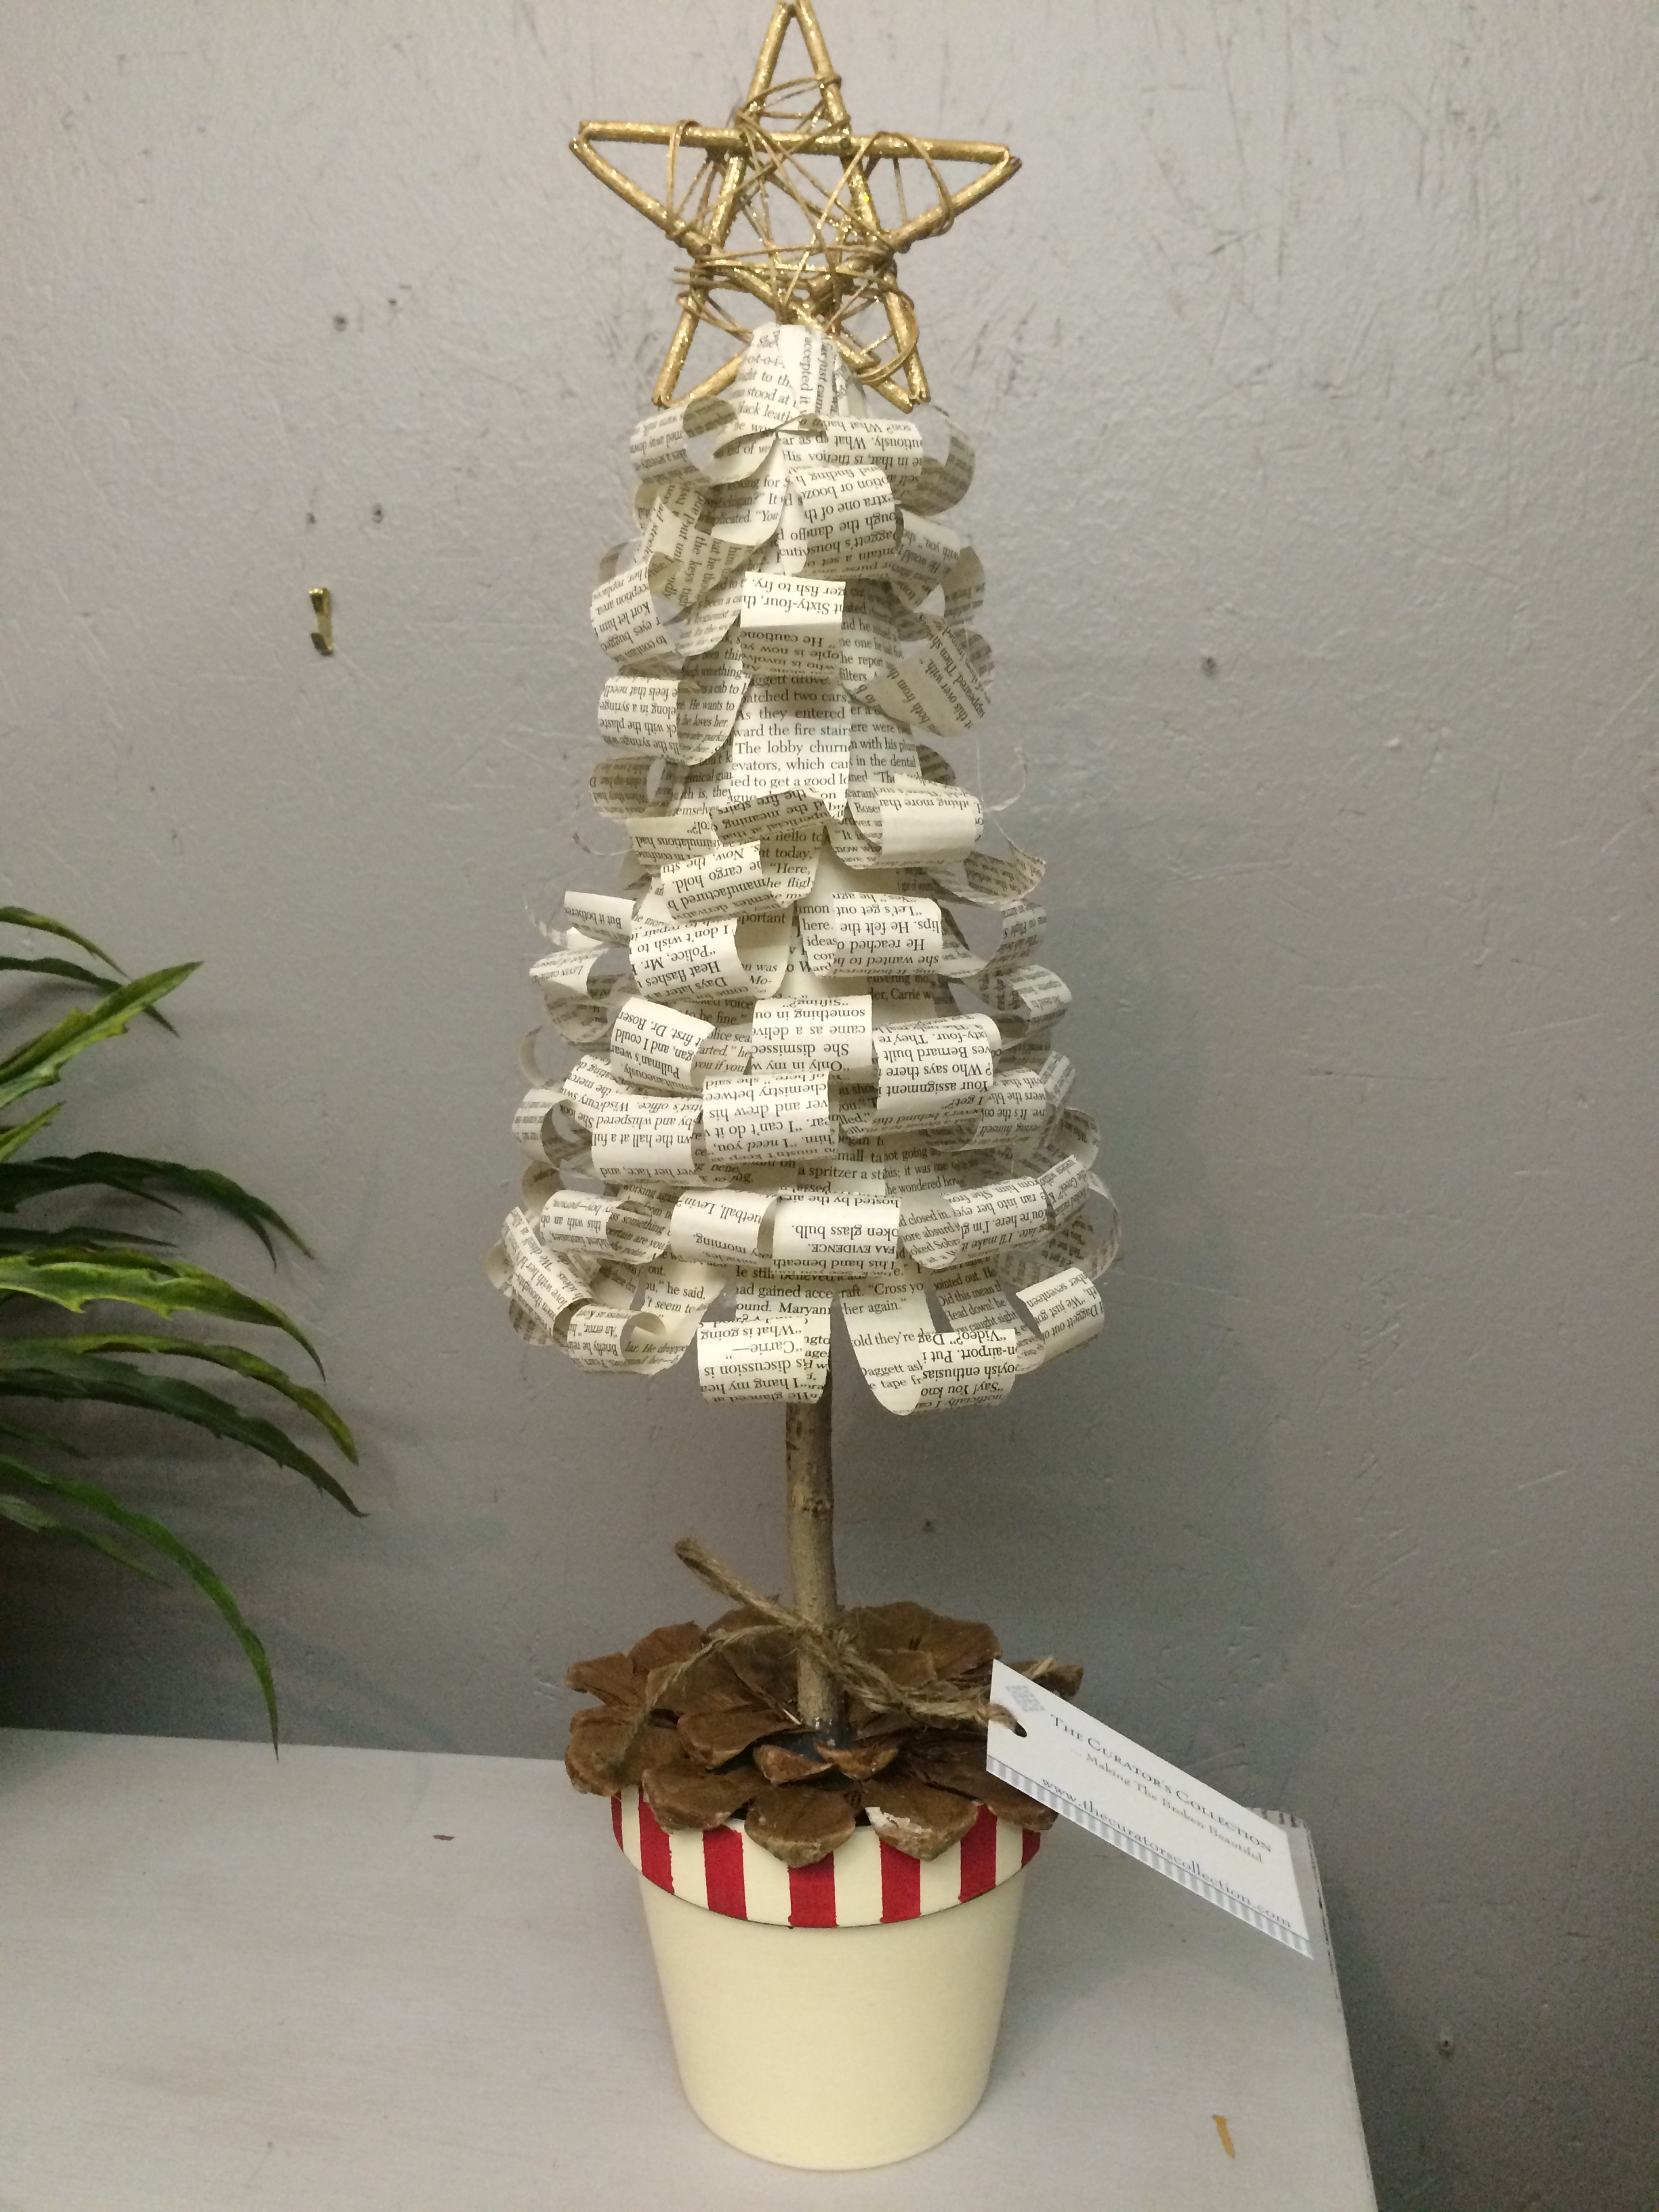
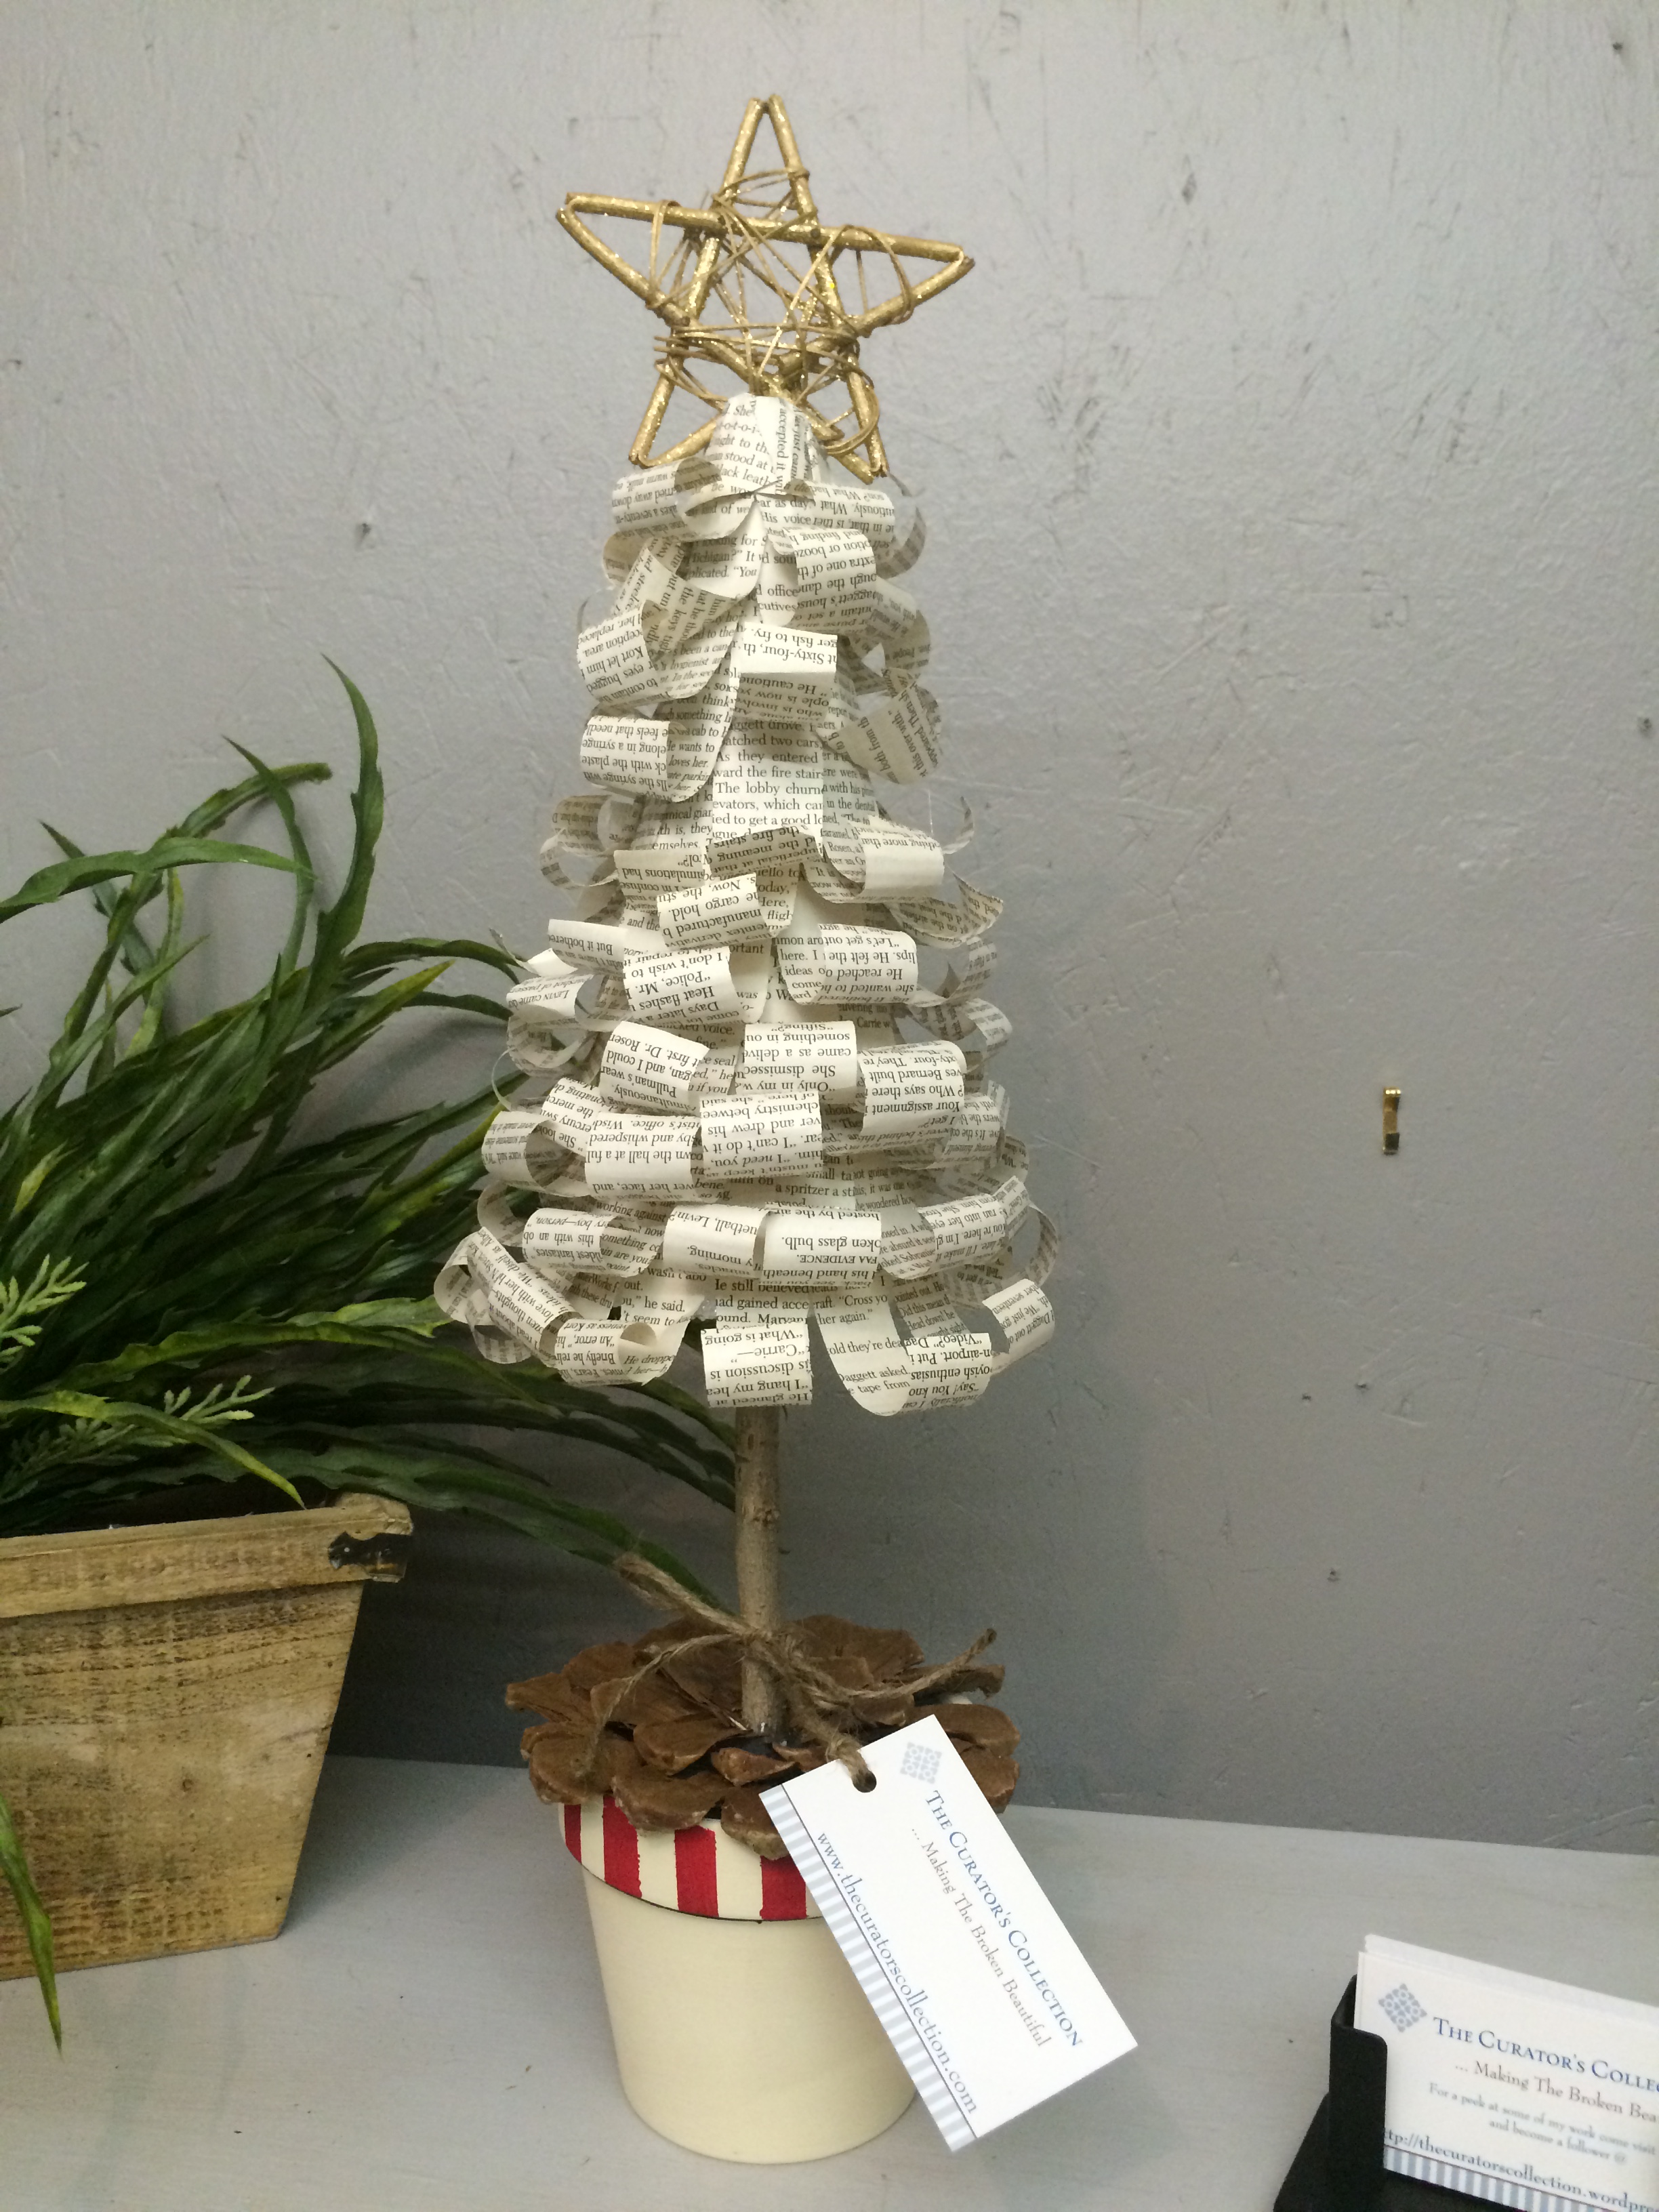
Last week I shared how to make book page Christmas ornaments. Today I will share with you how to make a tree using the same materials.
They are so cute and easy to make. Depending on what size of styrofoam cone you use, you can make them as big or small as you’d like.
 Here is what you’ll need:
1. Styrofoam cone Your choice of size. I bought mine at our local dollar store.
2. Pencil
3. Scissors
4. Old book that you don’t mind cutting up. Preferably one with yellowed pages for that antique look.
6. Hot glue gun and glue sticks
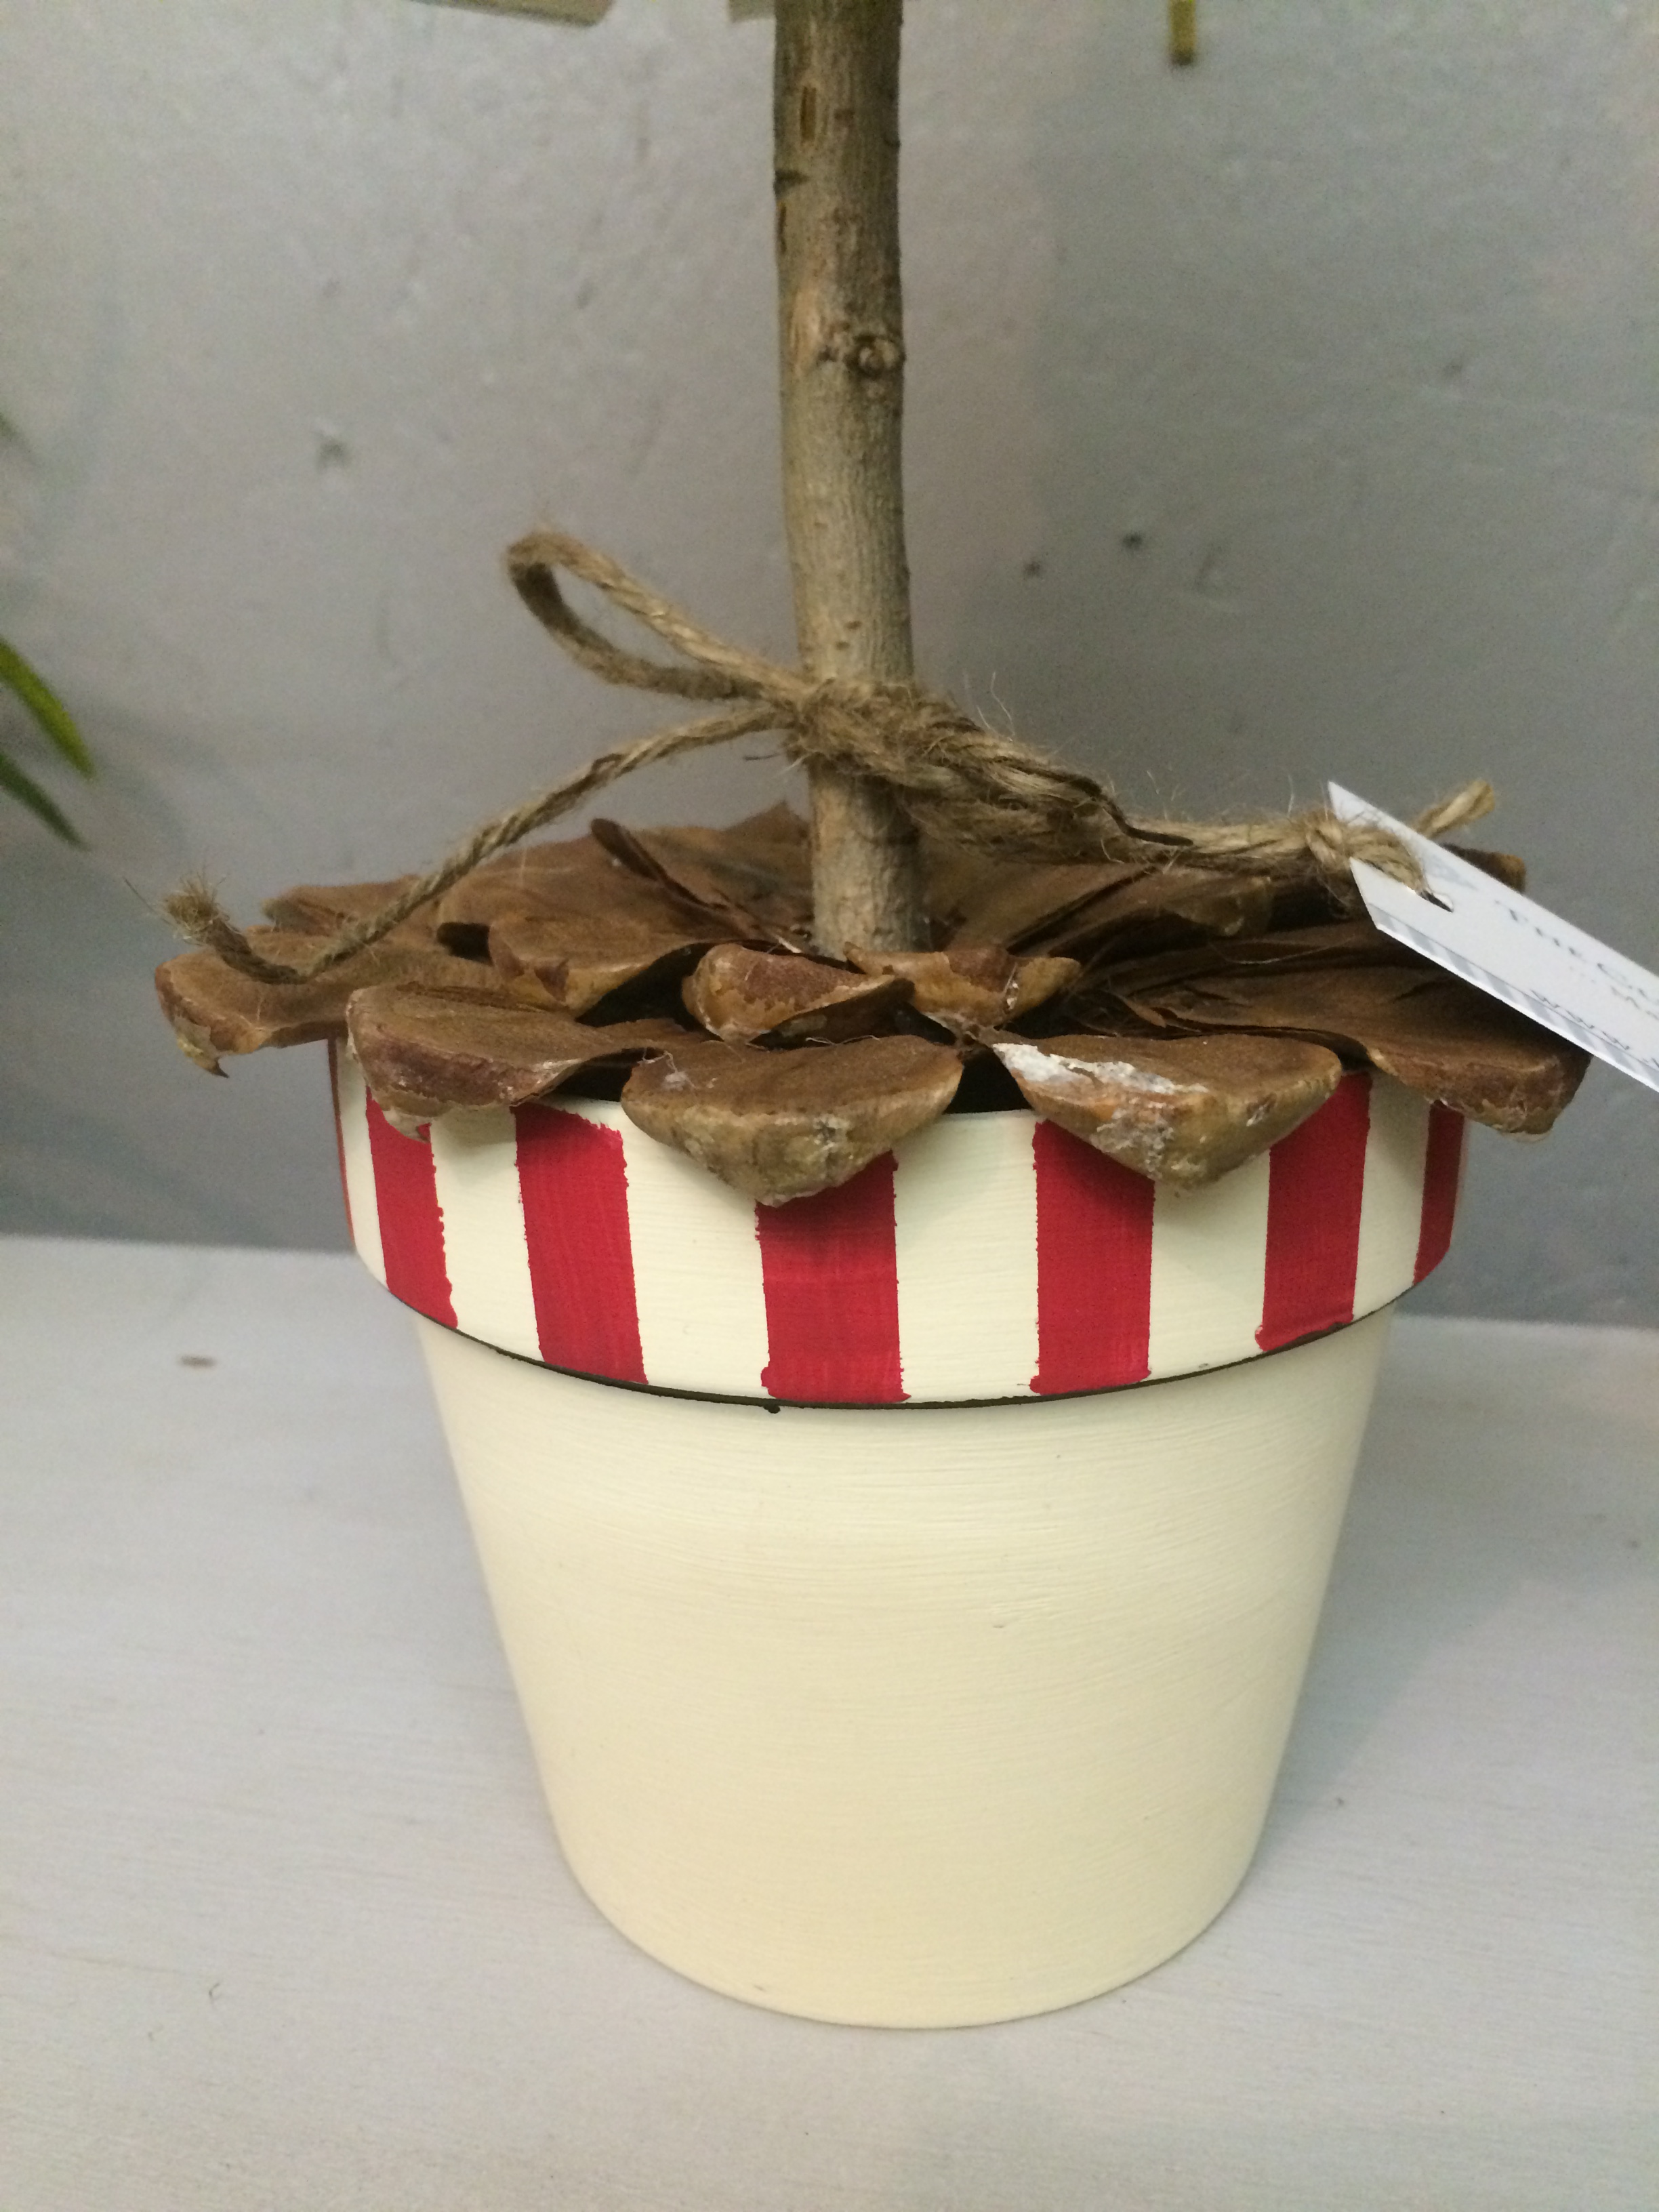
7. Florist foam and moss (I ran out of moss so I used the petals of a large pine cone to cover the foam in the pot)
8. Small terracotta plant pot. (also from dollar store, 2 for $1.00)
9. Smaller branches or twiggs to use as the tree trunk
10. Acrylic paints to paint the pot if you so wish.

 To start, cut your book pages into strips about 2 inches long and 1 inch wide. You will need about 1 – 2 hundred depending on the size of tree you make. I just cut mine as I go.
Next take your pencil and roll 1 piece of paper onto it leaving a thumb width at the end. Don’t roll too tight as the paper will end up too curly and your tree will look odd. Don’t roll too loose though as your paper will relax a little and you do want the ends to curl up.
After rolling the paper on your pencil, remove it and glue to the cone starting at the bottom of the cone. Continue doing this all around the cone working your way up to the top until completely covered.
 Once you have reached the top you can cover the point of the cone with a piece of book page cut into a circle. Place a dab of glue on the center and mold it around the top.
Next cut your florist’s foam to fit inside the clay pot. You can paint your pot first if you wish, I did mine in antique white and Christmas red acrylic from the dollar store. After placing your foam in the pot cover the foam with the floral moss tacking it in place with dabs of glue.
Next take one of your twigs and push it into the bottom of your cone to create a stem on tour tree. you can make it as short or tall as you choose. Then take the tree and press it into the center of the florist’s foam in the pot. I put hot glue on the end of my twig first to help hold it in place. I also ran out of moss and used pine cone petals glued to the top to hide the foam.
I added a star to the top of my tree but you can leave it off too. You can also make these without a stem or pot and just have it sitting flat on your table. Create a little vignette out of three trees in different sizes!
So cute and so easy to make!
 Happy crafting all!
Smiles!
Terry


This is too cute! I want to do this….it’s cute, different and easy on the budget. I’ll go to Good Will and buy a few books. Thanks for the inspiration and tutorials. I would love to do the ornaments and string them in the form of garland. I better get busy. :-).
LikeLike
It’s a fun craft to do, thank you for the visit! I’d love to see this done as garland! Sooooo pretty!
Have a nice weekend!
Smiles!
Terry
LikeLiked by 1 person
[…] of an old book for an antique feel to coordinate with the vintage Christmas tree. See here by The Curators Collection. It’s so […]
LikeLike
Thank you Linda for sharing my work! You’re sweet!
I hope you have a great week!
Smiles!
Terry
LikeLike