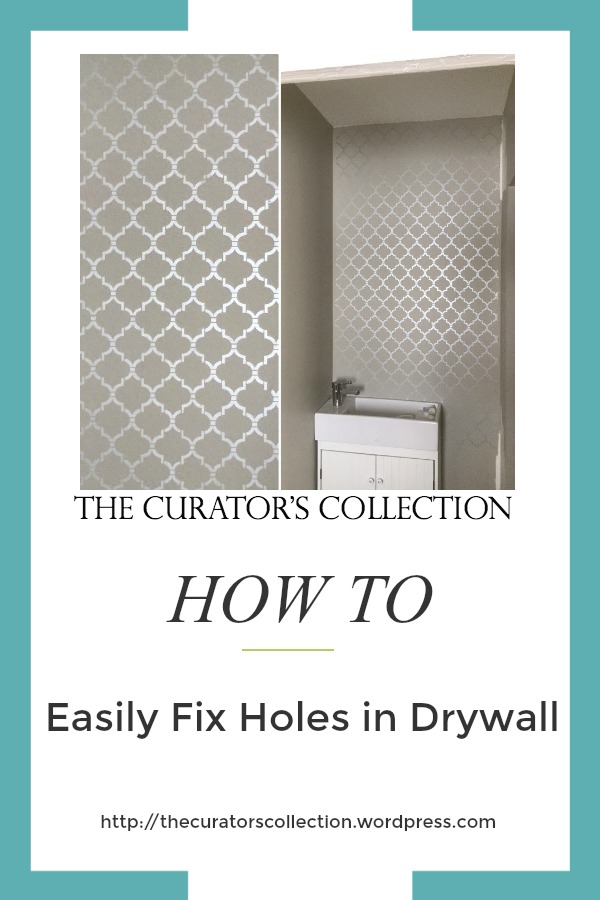
How To Easily Patch Drywall
5April 7, 2017 by Terry
Today I thought I’d take a step back from furniture projects and share with you this easy method for patching large holes in drywall.
Let’s face it sometimes accidents happen and we can end up with unsightly holes in the walls. If you are a furniture re-arranger like I am then you know how easily this can happen. That’s not to say that it happens to me all the time, but it has happened.
Do not worry and do not call your local drywall guy! It CAN be fixed and it CAN be done by YOU!
Recently I was privileged to be part of the renovating of a large townhouse. I was painting in the newly constructed 1/2 bath on the main floor. Because it was newly constructed, existing pipes etc. had to be moved and holes were left in the drywall.
Now, sadly one of the contractors was insistent that it could just be patched over by slapping drywall mud over the hole repeatedly until it filled in. This is so wrong on so many levels (considering the size of the hole) and I really didn’t have time to wait for his technique to work, I had a room to finish painting and stencilling.
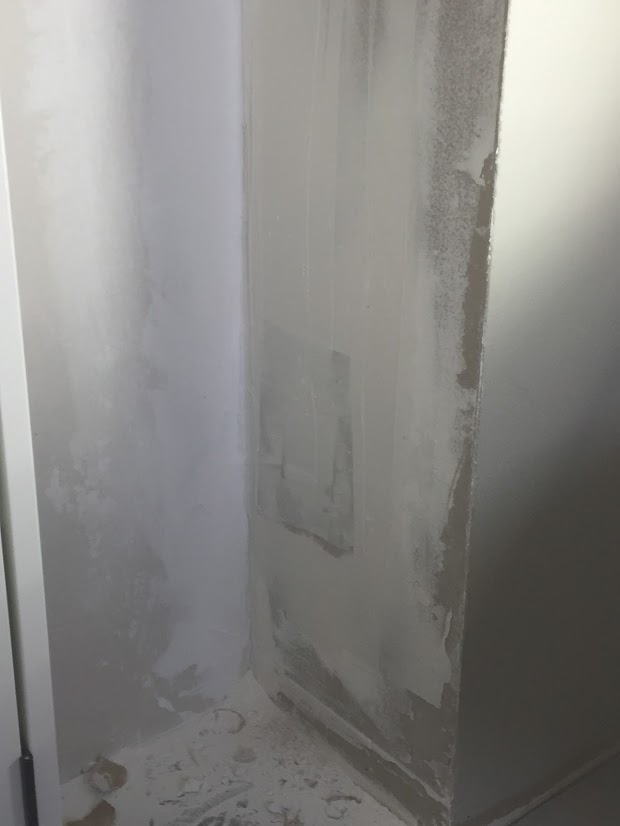
He refused to listen to me when I told him that there was a better and easier way to fill the hole properly. I left him to do it his way and when I came back the next day this is what the hole still looked like … (insert grumble here!)
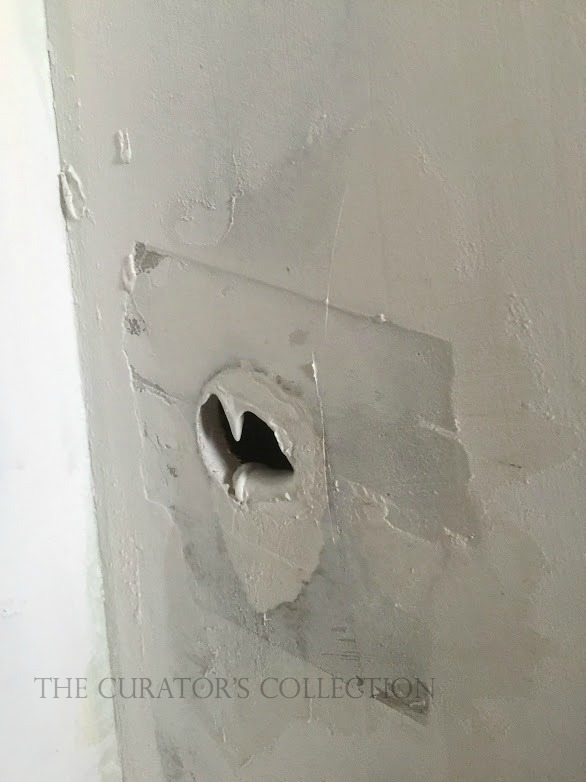
I was a little grumpy at the sight of it to say the least and this hole was holding up my progress. Time to take and do the job myself. All the mud that the fellow had applied was just seeping into the hole on the other side.
I guarantee you that you can fix any hole in 5 min if you just take the time to do it right the first time. It does not have to be as complicated as the photo above.
Here is a very brief guide to getting it done quickly and correctly!
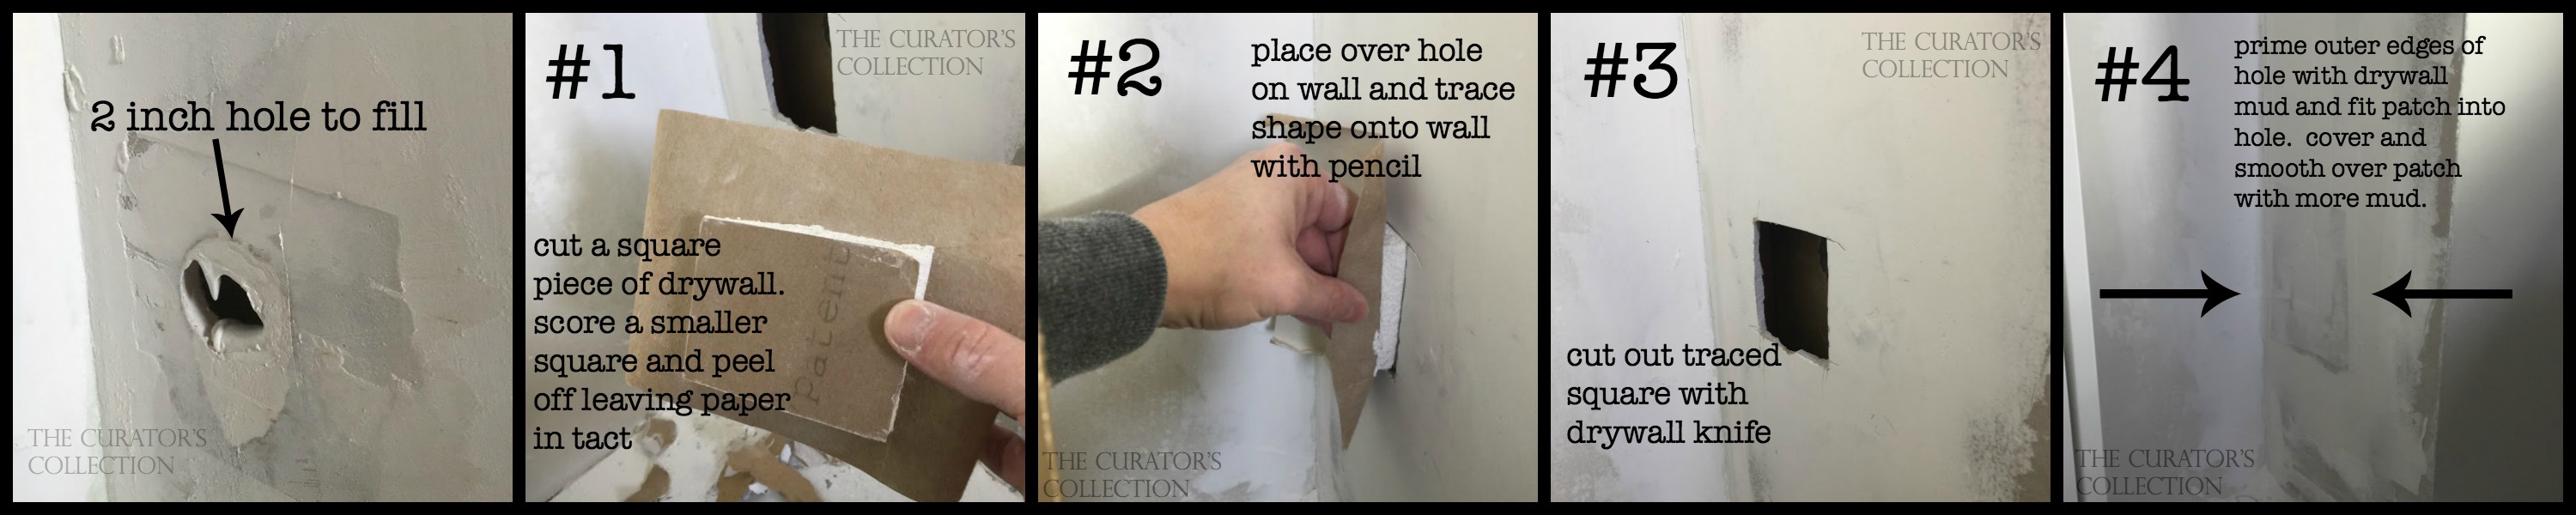
- find a scrap piece of drywall. i only had a 2 inch hole to fill so i made my piece a 6 inch square. then i scored a 2 inch square in the centre and broke off the outer edges leaving the paper attached to the remaining 2 inch square.
- next i held it up over the existing hole and traced the shape of my square onto the wall. this will ensure that your patch will fit perfectly into the hole you are going to cut. simply trace your shape.
- after your shape is traced simply follow the lines with a drywall knife and pop out the excess creating a new (and most likely larger) hole in the wall. you can now place your previously cut patch in the hole to make sure it fits snugly. adjust accordingly if needed by shaving the edges until it’s just right. remove patch and follow step 4.
- prime the outer edge of the hole in the wall with a thin layer of drywall mud. place your patch in the hole and smooth down the paper until it becomes smooth. finish off with a coat of mud over the entire patch blending or feathering the edges in to the rest of the wall.
- let the mud dry and sand lightly. reapply mud if needed until it is blended smooth with the rest of the wall. do a final sanding and you are ready to paint!
It really is just as easy as that!
The hardest part is waiting for the mud to dry!
With paint on it, you will never even know the hole was there …
When the fellow came in to continue his fixing of the hole he was rather surprised with what he saw.
He gave me a sheepish ‘thank you‘ and a ‘I guess I should have listened to you in the first place‘.
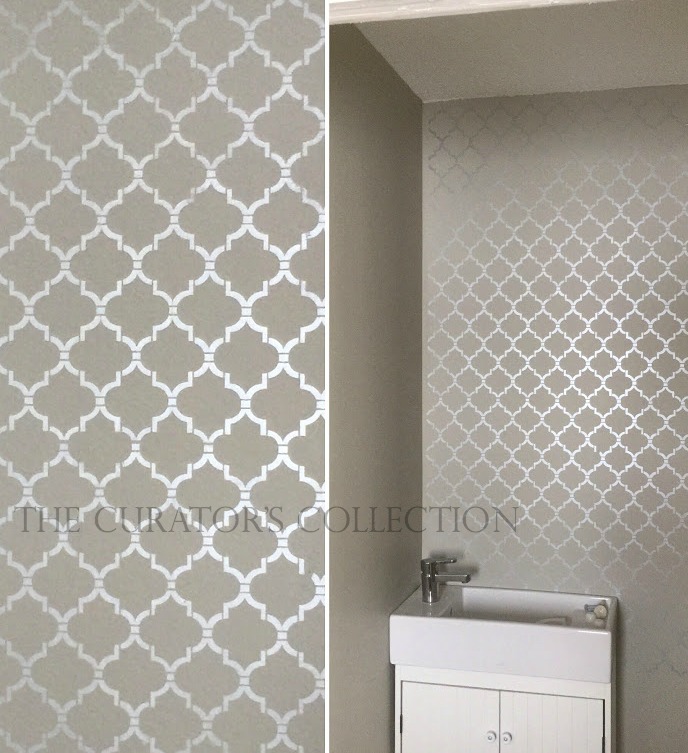
I managed to finish painting the small space and it looks great! I felt that this tiny 1/2 bath deserved a little something to jazz it up so I stencilled this pretty geometric shape on the sink wall using metallic paint. Having just one feature wall like this gives this ever so tiny space a little character.
Have you ever struggled with a hole in the drywall? How did you take care of fixing it? If you try the above tips make sure you let me know how it turns out for you :)
Happy patching!
Smiles!
Terry


I sent you a fist pump when I read how the contractor came back and saw your handy work. Don’t EVER underestimate the power of a woman!!! Great tip Terry and pinning to share. Hope you have a terrific weekend.
LikeLike
Thank you, I needed this because I have a hole in the closet to repair.
LikeLike
Don’t ya just love when you prove a “pro” wrong ;) at least he said thank you! Love the stencil!
LikeLike
you do make it sound really easy!!!! just posted my DIY feature wall update on the blog!!
LikeLiked by 1 person
Good stuff!
LikeLike